How to Install Django on Ubuntu 18.04
Django is a free and open-source high-level Python web framework that encourages developers to develop fully-featured Python Web Applications. Using Django you can build secure, scalable and maintainable web applications.
Django framework wrote a well structured that helps to do quickly create Python web applications. It provides higher security for the application and avoids developers for making many common security mistakes.
There are different methods to install the Django framework on Ubuntu:
- Install Django with
pipin a virtual environment - Django install from packages
- Install Django from GitHub Repo
In this tutorial, we are going to install Django on Ubuntu 18.04 using Python Virtual Environment. The best thing to use Python virtual environments is to create an isolated environment for different Python projects.
Installing Django on Ubuntu 18.04
Here is a step by step instructions for how to install Django in a Python virtual environment on Ubuntu 18.04. Before we start to install Django on Ubuntu 18.04 you must have the non-root user with sudo privileges.
Prerequisites
First, Install tree package to better understand on our further tutorial.
sudo apt install treeInstall Python 3
Python 3.6 by default installed in Ubuntu 18.04. You can verify the Python 3 is installed in your system using the following command.
python3 -vThe output should look like below. Please note that the version number may vary.
Python 3.6.8Install pip3 Package
Next, Install pip package from the Ubuntu repositories.
sudo apt install python3-pipInstall virtualenv modules
Now, you run the following command to install virtualenv to create a virtual environment in Python 3.
sudo pip3 install virtualenvCreate and Activate Virtual Environment
Once you installed virtualenv module, create a new directory for your Django application and go inside the directory.
mkdir django_app && cd django_appNow, we have to create and activate Virtual environment for Django Applications.
python3 -m virtualenv env_nameFurthermore, run the following command to activate the virtual environment in order to start using the virtual environment.
source env_name/bin/activateAs you see path is changed and it will show the name of your environment (env_name).
Install Django
You can use the pip Python package manager to install Django.
pip install DjangoNote: In this virtual environment directory you can use python instead of python3 command and pip instead of pip3 command.
Use the following command to check and verify the installed Django version.
python -m django --versionThe output should look like as per given below. Django version number may vary.
2.2.6Create First Django Project
Create a Django project by using the django-admin command-line utility. Here, firstapp is a project name.
django-admin startproject firstappThe above command will create a firstapp directory in your current directory. Run the following command to see the directory structure.
tree firstappOutput
firstapp
├── firstapp
│   ├── __init__.py
│   ├── settings.py
│   ├── urls.py
│   └── wsgi.py
└── manage.py

1 directory, 5 files
You see above, manage.py used to manage the project. Moreover other files are Django specific about database configuration settings, routes, and settings.
Database Migrate
Default, Django uses an SQLite database. However, in production applications, you can use PostgreSQL, MariaDB, Oracle or MySQL Database.
Go to firstapp directory.
cd firstappNow we need to migrate the database using below command.
python manage.py migrateOutput
Operations to perform:
  Apply all migrations: admin, auth, contenttypes, sessions
Running migrations:
  Applying contenttypes.0001_initial... OK
  Applying auth.0001_initial... OK
  Applying admin.0001_initial... OK
  Applying admin.0002_logentry_remove_auto_add... OK
  Applying admin.0003_logentry_add_action_flag_choices... OK
  Applying contenttypes.0002_remove_content_type_name... OK
  Applying auth.0002_alter_permission_name_max_length... OK
  Applying auth.0003_alter_user_email_max_length... OK
  Applying auth.0004_alter_user_username_opts... OK
  Applying auth.0005_alter_user_last_login_null... OK
  Applying auth.0006_require_contenttypes_0002... OK
  Applying auth.0007_alter_validators_add_error_messages... OK
  Applying auth.0008_alter_user_username_max_length... OK
  Applying auth.0009_alter_user_last_name_max_length... OK
  Applying auth.0010_alter_group_name_max_length... OK
  Applying auth.0011_update_proxy_permissions... OK
  Applying sessions.0001_initial... OK
Create Administrative User
Create an administrative user so that you can use the admin interface of the Django application.
python manage.py createsuperuserThe above command will prompt you to set a username, an email address, and a password for an administrative user.
Username (leave blank to use 'speedysense’): admin
Email address: [email protected]
Password:
Password (again):
Superuser created successfully.
Start the Development Server
Finally, start the development server using manage.py script followed by the runserver option.
python manage.py runserverYou’ll see the following output:
Watching for file changes with StatReloader
Performing system checks...
System check identified no issues (0 silenced).
October 14, 2019 - 08:45:12
Django version 2.2.6, using settings 'firstapp.settings'
Starting development server at http://127.0.0.1:8000/
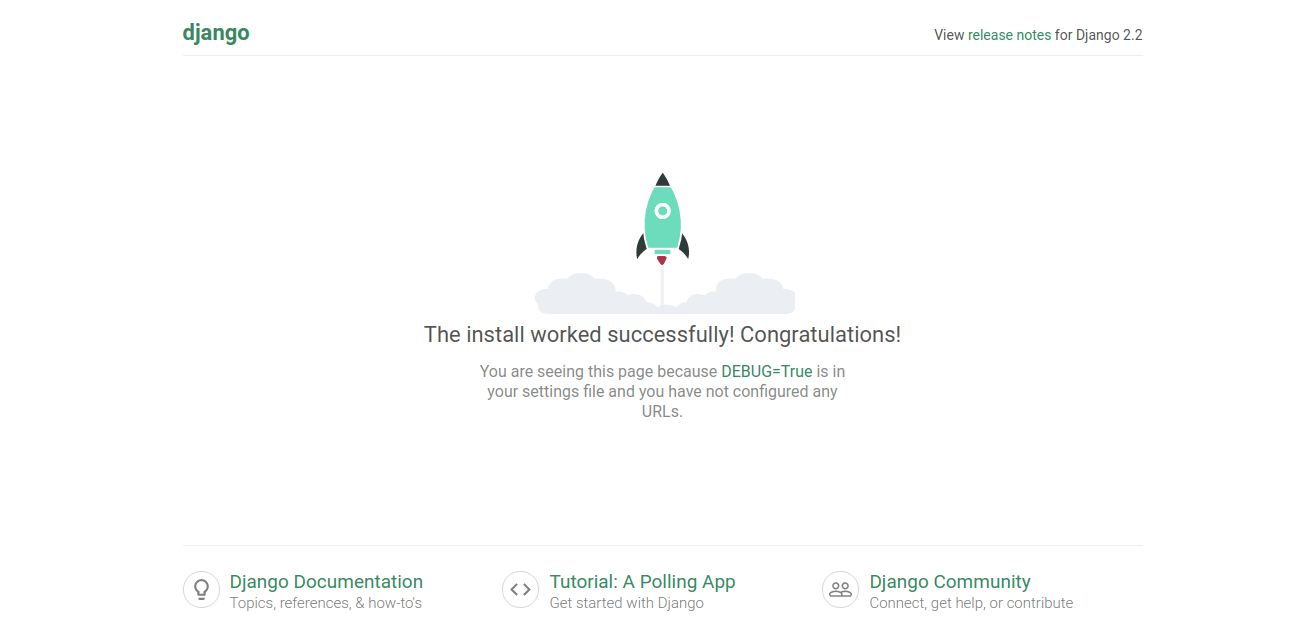
Quit the server with CONTROL-C.Go to http://127.0.0.1:8000/ in your browser you will get the following page.
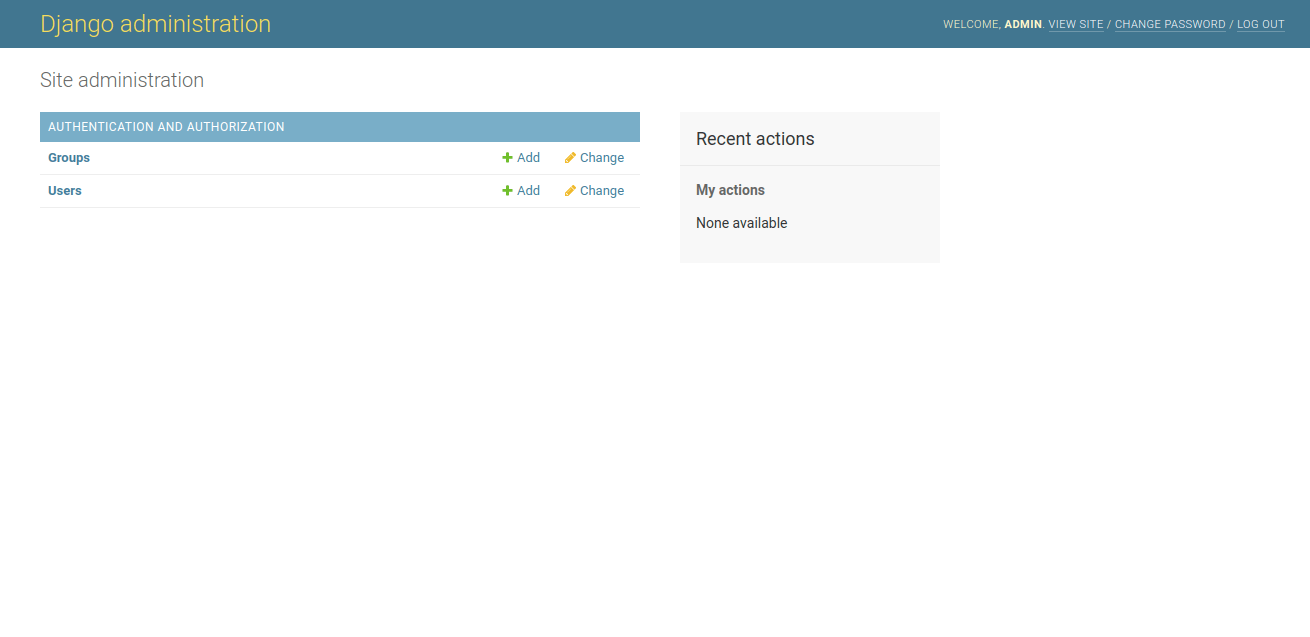
You can access the Django admin interface by visiting http://127.0.0.1:8000/admin/ page.
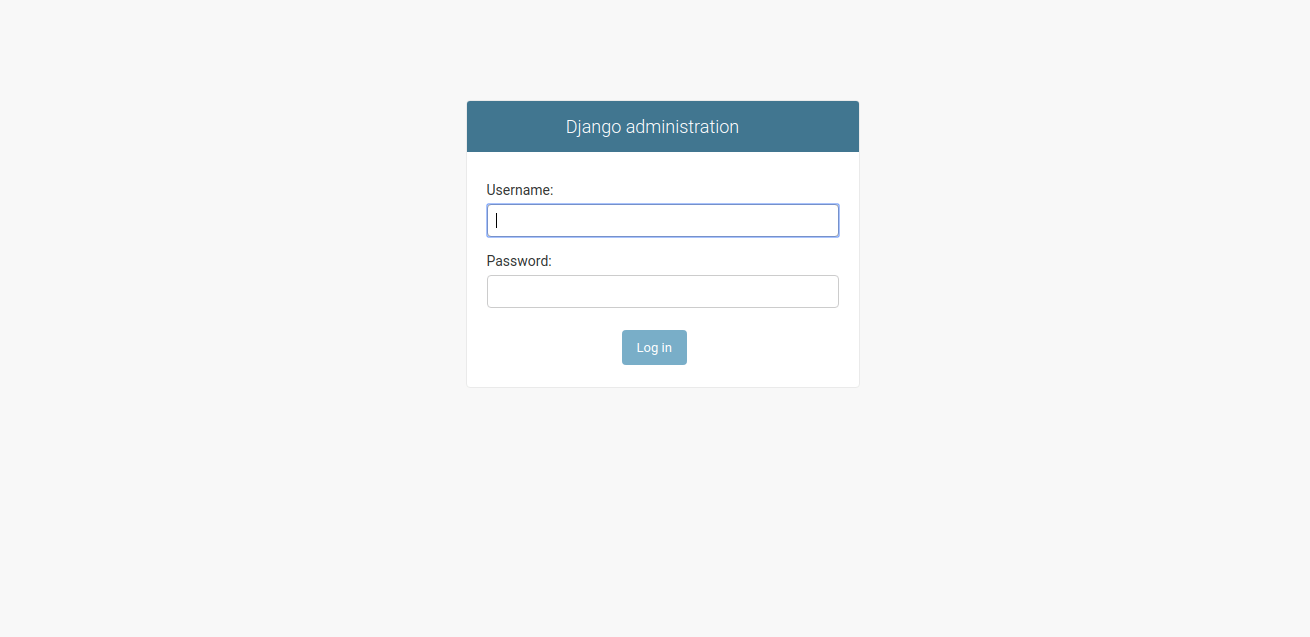
Here, your username and password and you will be redirected to the Django admin panel.
You can stop the development server pressing CTRL+C in your terminal.
Deactivate The Virtual Environment
Once you complete your work you can deactivate the virtual environment by the following command. And you will go back to your normal shell.
deactivateIf you are a newbie for Django, you might need to follow Django documentation. This documentation will help you to develop your first Django application.
Final Thoughts
That all you need to know how to create a Python virtual environment. Furthermore, we are going through step by step Django installation in Ubuntu 18.04. Even more, we see how to migrate the database, and create a superuser for Django.
We hope you have found this article helpful. Let us know your questions or feedback if any through the comment section in below. You can subscribe our newsletter and get notified when we publish new articles. Moreover, you can explore here other Python related articles.
If you like our article, please consider buying a coffee for us.
Thanks for your support!
 Buy me a coffee!
Join the Discussion.